Tim: Like all other junior high school boys at the time, I was required to take Woodshop class. I used saws and chisels and drills and clamps and glue but it just didn’t stick. The best I could do was “C” work. While the junior-high schoolboys were constructing bookshelves, the girls were in Home Economics class. In her Home Ec class, Ann was taught to sew and to cook. She tells me that students were tested on their ability to choose the right-sized mixing bowl for preparing cake batter. Ann had a passion for sailing, not cooking. She couldn’t get a handle on it.
Ann: Fast forward from the 1960s to last week. On Friday Tim and I joined in with several other WREN team members and Eric Jones of The Institute for Culture and Ecology for a lesson in Home Economics, Kalapuya style. For the first-annual Native American Wetlands Culture Day, Kalapuya elder and storyteller Esther Stutzman was gracious enough to direct all of us in the art of roasting camas bulbs. And nobody graded us on proper bowl selection!

Esther Stutzman, Kalapuya elder and storyteller
The camas is a plant in the lily family, with a lovely blue flower.

Common Camas
Tim: The camas plant stores energy underground in a bulb, similar to the way a potato plant stores energy in a potato.


Camas bulbs
When properly prepared, the camas bulb is mighty tasty, and was a staple in the diet of the ancient Kalapuya of the Willamette Valley. You must know what you are doing, though, because uncooked camas bulb tastes yucky. Also, eating the bulb of a similar relative, death camas, will result in just what its name implies.
Ann: Here is the recipe for yummy roasted camas bulbs:
STEP 1:
Dig a pit about 2 feet deep. This will be the oven. If it’s late in the dry season, you’ll probably need to use a pick to penetrate the clay layer.

You can always call in your buddy to finish the job with a shovel:
STEP 2:
Spread the piles of dirt that came out of the pit all around it, to keep any stray sparks off the grass.
Also, be sure to water down the surrounding grass really well. Keep hoses and buckets of water handy, plus some nice wet burlap bags. Just in case!
STEP 3:
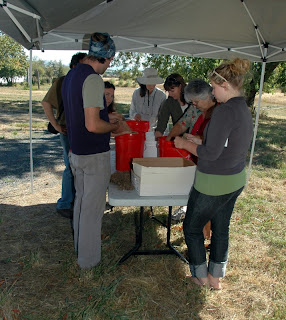
Clean the camas bulbs. Elder Esther Stutzman demonstrates the proper technique.
Get some friends to help clean, especially if you have 5 gallons of bulbs to clean!
STEP 4:
Get some more friends to help.
STEP 5:
Get lots more friends to help!
BEFORE and AFTER:
Since our bulbs were on the small side for camas bulbs, Esther had us leave the skins on to protect the bulbs from overcooking.
STEP 6:
Now you’re ready to line the bottom of the pit with dry river rocks. They must be very dry, or they might explode when they are heated.
STEP 7:
Now light a fire in the pit, right on top of the rocks:
STEP 8:
Keep adding wood until you’ve got some nice coals going:
STEP 9:
Once you’ve got a nice bed of coals, start layering:
First some fern fronds:
Then pour in the cleaned camas bulbs:
Add another layer of fronds, and water it really well:
And another layer of greenery to fill up the hole (we used blackberry branches), which you will tamp down nice and firmly and water again:

Cover the whole layer cake with wet woven mats (We didn’t have any mats, so Esther said wet burlap bags would work)
STEP 10:
Add more fern fronds:
STEP 11:
Now shovel dirt all over the whole thing:
STEP 12:
Have an all-night slumber party around the pit, to make sure that the fire stays put.
(We don't have any pictures--we were too busy strumming guitars and singing. Calling the sounds Tim was making "singing" is giving him the benefit of the doubt.)
STEP 13:
The next day, ENJOY!
(Once again, no pictures. We were too busy stuffing our faces. Check back later for an update of this post. Someone out there will have some photos. For now, just imagine smiling faces and "Ooh, these are good!" The camas bulbs were sweet and tangy with the consistency of a boiled potato.)
Tim: As Ann and I munched on the roasted bulbs, along with lots of other folks at the first-annual Native American Wetland Cultures Day, we thought about people long ago doing this very same thing perhaps at this very spot. We are told that ancient pits lined with rocks, presumed to be camas ovens, have been found in the West Eugene Wetlands. Evidence from those old ovens tells scientists that people were roasting camas bulbs here long, long ago--long before the Egyptian pyramids at Giza were built!
Ann: Our thanks to Esther Stutzman for the Kalapuya Home Economics class and for keeping the Kalapuya traditions alive. See Esther at:
http://www.turtleislandstorytellers.net/tis_oregon/transcript_e_stutzman.htm


No comments:
Post a Comment